
Front Strut Insert Replacement
This was my first time replacing strut inserts on a car. I had of course replaced shocks on a few vehicles, but that is a no-brainer. I gathered all the tools I would need including a large spring compressor and an offset 22mm box end wrench, both of which I was able to borrow from a friend of mine. I picked a nice, cold, rainy day to do my work, but at least I was able to use my mother's garage.
Replacing the struts can be dangerous, because of the large spring. Front struts are a pain, too, because you can easily goof up the wheel camber, making an alignment necessary. I got some good advice on what to do to avoid screwing up the camber, and I'll outline that below.
Tools I used:
Spring compressor (a one piece
design, safer than the two piece one's that most auto part stores
rent, borrowed).
22mm offset box end wrench (borrowed).
17mm open end wrench and socket.
13mm open end wrench and socket.
19mm socket.
Crescent wrench.
Large pair of channel lock pliers.
7mm Allen socket
Torque wrench.
Flat blade screwdriver.
Pipe wrench.
Hammer.
Chisel.
Bench mounted vise.
First, I put the car in the middle of the garage so there was plenty of room on either side of the car to work. I then jacked up the car and placed my 4-ton jackstands under the front of the car. I then removed the wheel and tires from the car.
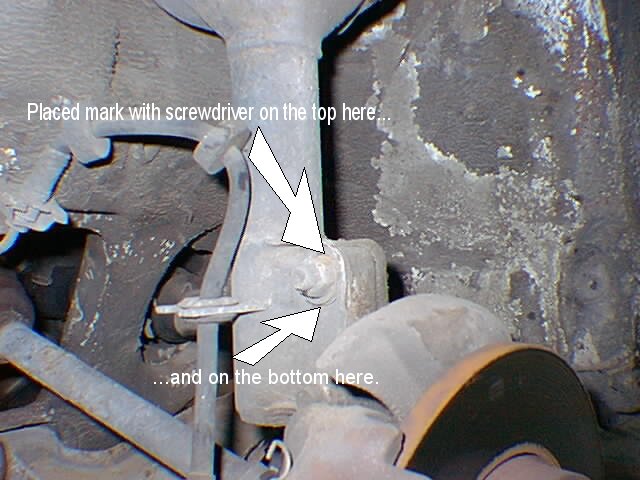
Next, I used the screwdriver to mark the lower part of the strut where the eccentric bolt and washer were located so I could put them back in the same place. I "outlined" them. See photo:
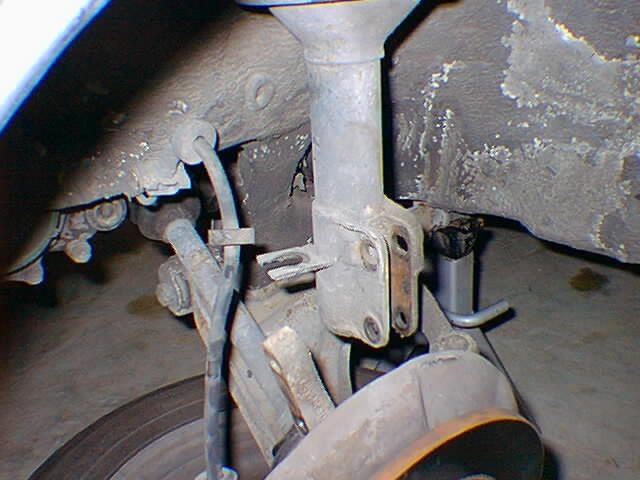
Next, I removed the brake line from the support on the strut. Using the 17mm wrench and socket, I loosened and removed both the eccentric bolt and the pivot bolt below. I placed the tire under the brake/hub assembly for support, but it didn't hang low enough to hurt the brake hose. Here's the brake/hub assembly once removed from the strut:
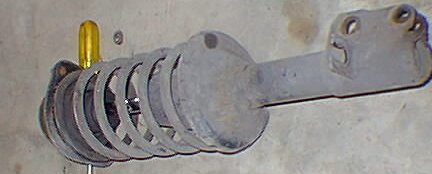
Before I removed the strut, I marked the top of the strut bearings so I would put them back in the car the same way they came out. I don't think that it matters greatly, but I don't think that it would hurt. I scratched an arrow on the bearings pointing to the front of the car. Next, I removed the two 13mm bolts from the inside of the engine compartment that hold the struts to the body. With those removed, the strut is free to be removed from the car. Here's the complete strut assembly after removal:
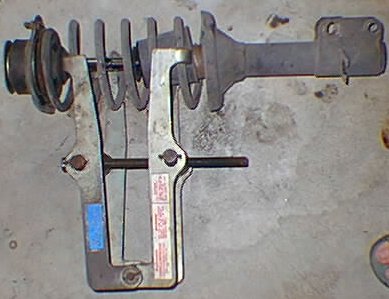
Now came the tricky part: compressing the spring to allow removal of the strut bearing. Using the spring compressor was tough at times. I got the compressor aligned as close as I could to be at the middle of the spring. See below:
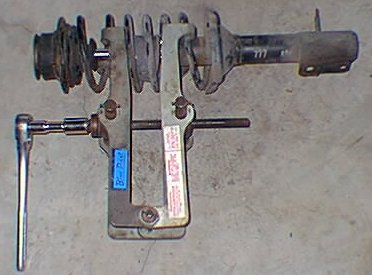
I slowly compressed the spring until I was able to tell that the tension had been removed from the strut bearing. Picture of the compressed spring:
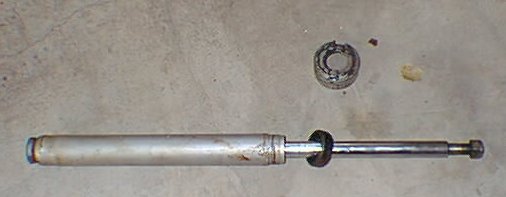
To remove the bearing, I used the 22mm offset wrench and the crescent wrench to loosen the locknut on the insert. The cresent wrench held the top of the strut insert while the 22mm wrench loosened the locknut. Once the locknut was removed, I removed the bearing, making note of the placement of all the pieces, ensuring they would be installed in the proper order. I then removed the spring from the rest of the strut. There is a large nut on the strut housing, holding the insert in. To remove this nut, I put the strut in a vise and put a pipe wrench around the nut. The nut was on so tight, I had to use a three foot cheater pipe on the wrench and have a friend tap on the nut with a chisel to get it to move. The new inserts came with a new nut, so I wasn't too concerned about any damage to the nut. Here's the old insert that's been removed, and the large nut that secured it in place:
Installation is reverse of removal! Before installation, I spent a minute or two pumping up the new inserts. Then I dropped the new inserts in the strut housing, and installed the large nut. I used a pair of large channel locks to snug that nut down. I put the spring back on the strut housing, reinstalled the strut bearing and all it's washers, and screwed down the lock nut. The new inserts had a recessed allen head in the top to hold the insert while I tighted down the lock nut to 52 foot-pounds. While tightening, I kept checking the bearing to ensure it was still spinning freely. If it binds, you'll need to remove and check all the pieces, making sure everything was installed in the right order. After the bearing is installed, the spring can be released. Once uncompressed, the strut assembly is ready for installation in the car.
Next, I put the strut back into the car, making sure to line up the bearing the way it came out. I installed and torqued the 13mm nuts to 15 foot-pounds. Then I installed the brake/hub assembly back onto the strut. I inserted the pivot bolt first, but tightened the nut just finger tight. I then put the eccentric bolt in, put it's washer on, and used the 17mm wrench to align the washer with the marks I had made earlier. Once I got it aligned, I tightened the nut down with the 17mm socket, then torqued it to 52 foot-pounds. I then torqued the pivot bolt down to 52 foot-pounds as well. Finally, I inserted the brake hose and grommet back into it's holder on the strut.
I repeated the same for the other side. One side my stepdad and I were able to loosen the locknut from the strut bearing on the garage floor, for the other side, we had to put it in a vise to get the leverage we needed. Both sides needed the vise to remove the large nut that holds the insert in.
Thanks to my stepdad Floyd who lended an extra set of hands loosening some of those tough nuts, and to Floyd's neighbor Ken who let us use his bench mounted vise.
Length of job: 3.5 hours (1.5
hours for right side, 2 hours on left)
Cost of job: $41 for strut inserts
Savings by doing job myself and NOT paying NTB to do it: $200
Satisfaction of doing it myself: Priceless!
Last revised: January 9, 2000.
Comments? Questions? Email me at kittman@swbell.net!